The Aeropress Go is a compact, lightweight, and portable coffee brewing device designed for travel and everyday use. It delivers smooth, full-bodied coffee anywhere, anytime, with a sleek design made from durable, BPA-free materials. Perfect for coffee enthusiasts on the go, it offers versatility in brewing methods, including espresso-style, Americano, and cold brew, making it a must-have for any coffee lover seeking convenience and quality.
1.1 Overview of the Aeropress Go and Its Design
The Aeropress Go is a compact, lightweight coffee brewer designed for travel and everyday use. Made from BPA-free polycarbonate, it is durable and portable, with all parts fitting neatly into the included mug for easy storage. Its cylindrical design features a hexagonal plunger for smooth operation, while the compact size ensures it fits easily in bags or luggage. The Aeropress Go is engineered to be travel-friendly, offering a convenient way to brew high-quality coffee anywhere, without compromising on flavor or ease of use.
1.2 Key Features of the Aeropress Go
The Aeropress Go features a compact, lightweight design with a travel-friendly mug that stores all components. It includes a plunger, chamber, filter cap, and reusable or paper filters; The device is made from BPA-free materials, ensuring safety and durability. Its portability allows for easy brewing anywhere, while the smooth plunger action reduces effort and mess. The Aeropress Go supports multiple brewing methods, including espresso-style, Americano, and cold brew, offering versatility for coffee lovers on the go.

Unboxing and Initial Setup
Unboxing the Aeropress Go reveals a sleek, portable design with a mug, plunger, chamber, filters, and stirrer. Easy to assemble and ready for brewing anywhere.
2.1 What’s Included in the Aeropress Go Package
The Aeropress Go package includes a compact brewing chamber, plunger, reusable steel filter, travel mug, stirrer, and 350 paper filters. It also comes with a detailed instruction guide to help you get started. The mug doubles as a storage container, holding all components neatly for travel. This comprehensive set ensures you have everything needed to brew delicious coffee wherever you are, making it ideal for both home and outdoor use.
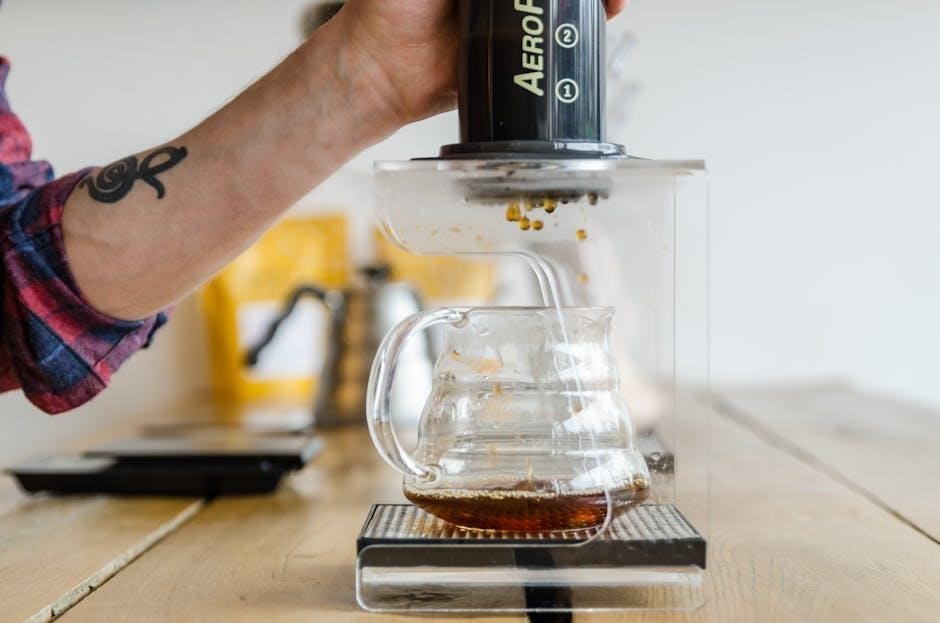
Start by rinsing the Aeropress Go with hot water to ensure cleanliness. Insert the plunger into the brewing chamber, extending it just past the number 3 mark. Place a paper filter in the filter cap and screw it onto the chamber. Lightly rinse the filter with water to remove any paper taste. Add your ground coffee, then pour hot water over it. Stir well and allow it to steep before pressing. This setup ensures a smooth and efficient brewing process for your perfect cup of coffee.
Step-by-Step Brewing Instructions
2.2 Assembling and Preparing the Aeropress Go
Rinse the Aeropress Go with hot water. Insert the plunger into the chamber, add a filter, and rinse it. Pour in ground coffee, then hot water, and stir before pressing for the perfect brew.
3.1 Standard Brewing Method
Rinse the Aeropress Go with hot water and insert a paper filter. Add 13-17 grams of ground coffee. Pour 200-260 ml of hot water (85°C). Stir gently and let steep for 1-2 minutes. Slowly press the plunger to separate the grounds from the liquid, stopping before resistance increases. The result is a smooth, rich coffee concentrate. For a longer drink, dilute with water or milk to taste. This method ensures a balanced and full-bodied flavor every time, perfect for both beginners and coffee enthusiasts.
3.2 Inverted Brewing Method
For the inverted method, insert the plunger just past the number 3 on the chamber. Add 13 grams of finely ground coffee, then attach the filter. Invert the Aeropress Go onto a mug, pour hot water, and let it steep for about 1 minute. Gently press the plunger to extract the coffee. This technique allows for a cleaner extraction and a smoother flavor profile, making it ideal for those who prefer a more nuanced brew. It’s a popular choice among enthusiasts for its unique brewing dynamics.
3.3 Cold Brew Brewing Method
For cold brew, steep coarse coffee grounds in cold water within the Aeropress Go chamber for 12-24 hours. This method eliminates heat, resulting in a smoother, less acidic flavor. After steeping, press the plunger to extract the coffee. The process is ideal for hot summer days or iced coffee, offering a refreshing and rich taste without the need for special equipment. The long steeping time ensures a bold yet balanced brew, perfect for those who prefer a mellow coffee experience.

Advanced Brewing Tips
Experiment with coffee-to-water ratios, grind sizes, and steeping times to tailor your brew. Adjusting these variables can significantly enhance flavor and suit your personal taste preferences perfectly.
4.1 Coffee-to-Water Ratio Recommendations
The ideal coffee-to-water ratio for the Aeropress Go is typically around 1:14, such as 18g of coffee to 260g of water. This ratio produces a balanced brew, but feel free to adjust based on your taste preferences. For a stronger brew, try a 1:12 or 1:13 ratio, while a 1:15 ratio yields a lighter cup. Experiment with these proportions to find your perfect balance, ensuring each sip meets your flavor expectations. Consistency is key, so consider using a scale for precise measurements if desired.
4.2 Adjusting Grind Size for Optimal Flavor
The grind size of your coffee significantly impacts the flavor when using the Aeropress Go. For the standard method, a medium-fine grind is ideal, similar to sand. If you prefer a stronger brew, opt for a slightly finer grind, while a coarser grind works well for a lighter cup. Experiment with different grind sizes to achieve your desired extraction. Ensure consistency by using a burr grinder, as blade grinders can create uneven particles. This balance will enhance the smooth, full-bodied flavor the Aeropress Go is known for, allowing you to tailor your coffee to your taste preferences perfectly.
4.3 Customizing Your Brew Strength and Style
Customize your Aeropress Go brew by adjusting steeping time, water temperature, and coffee-to-water ratio. For a stronger brew, use less water or a longer steep, while shorter steeping yields a lighter cup. Experiment with ratios like 1:12 for espresso-style or 1:14 for a balanced cup. Add water or milk post-brew to tailor strength. The Aeropress Go also excels at cold brew—steep grounds in cold water for 12-24 hours. These adjustments allow you to craft a variety of flavors, from rich espresso to smooth Americano, ensuring every sip matches your preference perfectly.
Cleaning and Maintenance
Regularly rinse the Aeropress Go with warm water after each use to remove residue. Dry thoroughly to prevent water spots. Store it in the provided travel mug for convenience.
5.1 How to Clean the Aeropress Go After Use
After each use, rinse the Aeropress Go thoroughly with warm water to remove any coffee residue. For deeper cleaning, use mild soap and water, ensuring no scratches occur. Dry all parts, especially the plunger and seal, to prevent water spots and bacterial growth. Regular cleaning maintains the device’s performance and hygiene, ensuring optimal brewing results. Avoid using abrasive cleaners or harsh chemicals, as they may damage the materials. Proper care extends the lifespan of your Aeropress Go, keeping it in excellent condition for travel and daily use.
5.2 Storing the Aeropress Go for Travel
The Aeropress Go is designed for easy storage and travel. After cleaning, fold the plunger and chamber into the included travel mug, ensuring compact portability. The mug’s lid keeps everything secure. For extended trips, store the device in its protective case to prevent damage. Always dry the Aeropress Go thoroughly before packing to avoid moisture buildup. Its lightweight and collapsible design makes it ideal for camping, backpacking, or office use, ensuring your coffee brewing kit stays organized and ready for any adventure.
Troubleshooting Common Issues
Common issues include clogged filters and plunger sealing problems. Rinse filters post-use to prevent residue buildup. Ensure the plunger is clean and free of debris for optimal sealing.
6.1 Dealing with Clogged Filters
Clogged filters can hinder the brewing process. To address this, rinse filters thoroughly after each use to remove residue. For stubborn clogs, soak filters in warm water or gently scrub with a soft brush. Regular cleaning prevents buildup and ensures optimal extraction. If a filter becomes torn or excessively soiled, replace it with a new one to maintain the quality of your brew. Proper maintenance extends the life of your filters and enhances your Aeropress Go experience.
6.2 Fixing Plunger Sealing Problems
If the plunger doesn’t seal properly, brewing can be uneven or messy. Ensure the Aeropress Go is clean and free of residue, as buildup can disrupt the seal. Rinse the plunger and chamber thoroughly after each use. For stubborn issues, lightly lubricate the seal with a small amount of water or mild soap. Proper alignment of the plunger is crucial; misalignment can cause leaks. If the issue persists, consider replacing the plunger seal. Regular maintenance ensures smooth operation and prevents future sealing problems, keeping your brews consistent and leak-free.

Accessories and Replacement Parts
The Aeropress Go comes with a travel case, filters, and a measuring spoon. Additional accessories like replacement filters and seals can be purchased separately for convenience and maintenance, ensuring optimal performance and portability for coffee lovers on the go.
7.1 Compatible Filters and Their Usage
The Aeropress Go uses standard paper filters or a reusable metal mesh filter for brewing. Paper filters ensure a clean, grit-free extraction, while the metal mesh allows more coffee oils to pass through, enhancing flavor. To use, place a paper filter in the filter cap, rinse with hot water, and attach to the Aeropress. For the metal mesh, simply screw it onto the chamber. Both options provide versatility for different brewing preferences. Replacement filters are widely available, making maintenance easy and convenient for daily use or travel.
7.2 Travel Case and Portability Features
The Aeropress Go comes with a convenient travel case that stores all components, including the brewer, filters, and stirrer, in a compact, lightweight design. Its portability makes it ideal for camping, travel, or office use. The mug-shaped case keeps everything organized and protected, ensuring the Aeropress Go is always ready for brewing on the go. This feature enhances its practicality for active lifestyles, allowing coffee lovers to enjoy their favorite brew anywhere without compromising on quality or convenience.