
Tresanti Adjustable Height Desk: Comprehensive Manual & Troubleshooting
This comprehensive guide provides detailed instructions for assembly, operation, and troubleshooting of your Tresanti adjustable height desk; It includes solutions for common issues,
like resetting the height sensor (RESDesk) and addressing error codes, ensuring optimal performance and longevity.
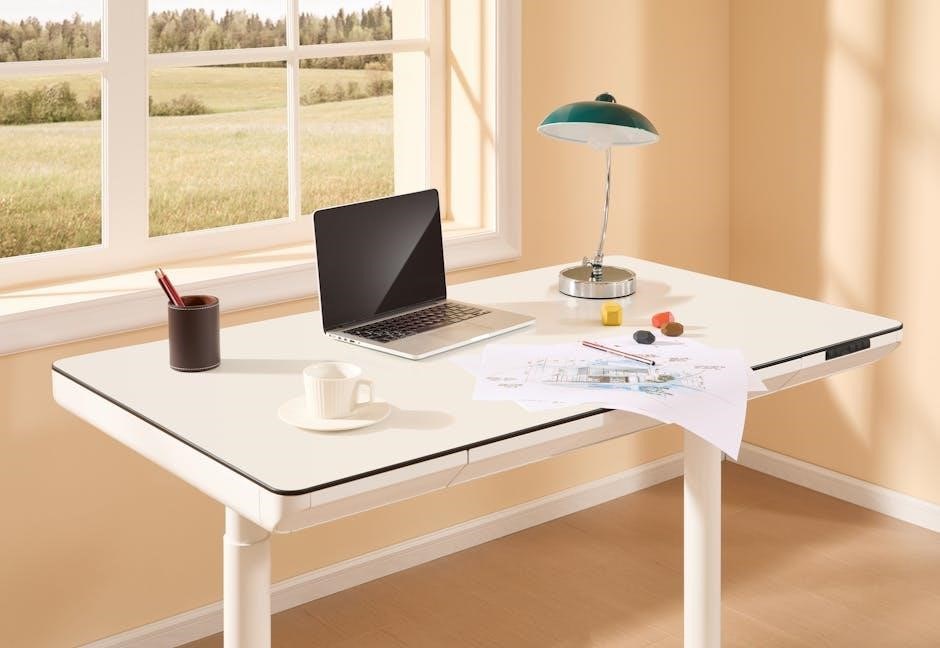
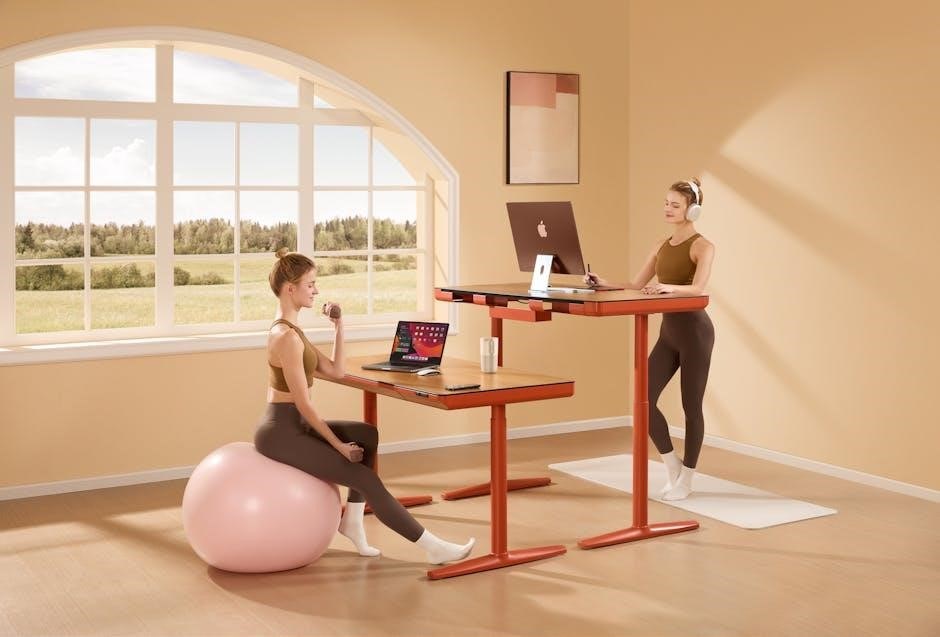
Welcome to the world of ergonomic comfort and productivity! Your Tresanti Adjustable Height Desk is designed to seamlessly integrate into both home and office environments, offering a modern minimalist aesthetic. This desk isn’t just furniture; it’s an investment in your well-being, promoting better posture and reducing strain during long work hours.
This manual serves as your complete resource, guiding you through every step – from unboxing and assembly to daily operation and resolving potential issues. We understand that setting up new furniture can sometimes be challenging, which is why we’ve prioritized clarity and detail. Tresanti is committed to providing not only high-quality products but also exceptional customer support, with a dedicated U.S.-based team ready to assist you.
Before you begin, please take a moment to familiarize yourself with the components and safety guidelines outlined in this manual. Remember, a properly assembled and maintained desk will provide years of reliable service. We’re confident you’ll be thrilled with your new Tresanti desk!
Key Features and Benefits
The Tresanti Adjustable Height Desk boasts a range of features designed to enhance your workspace and well-being. Enjoy seamless height adjustment, allowing you to effortlessly switch between sitting and standing positions throughout the day – promoting better circulation and reducing fatigue. The integrated control panel offers convenient operation, including programmable memory presets for your preferred heights.
Beyond ergonomics, this desk features a durable and stylish design, complementing any décor. The robust frame ensures stability, even at maximum height. The desk’s display provides clear feedback on height settings and status, including indicators like “bot” to signify the lowest position.
Benefit from a clutter-free workspace and increased productivity. Tresanti prioritizes customer satisfaction, offering U.S.-based support and a comprehensive warranty. Experience the difference a quality adjustable height desk can make – invest in your comfort and health today!
Understanding the Control Panel
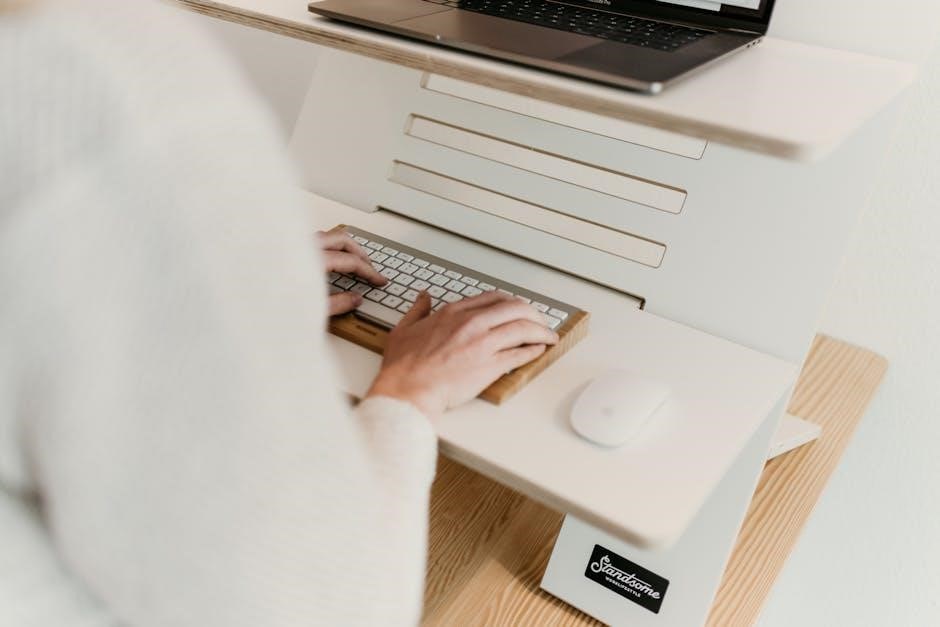
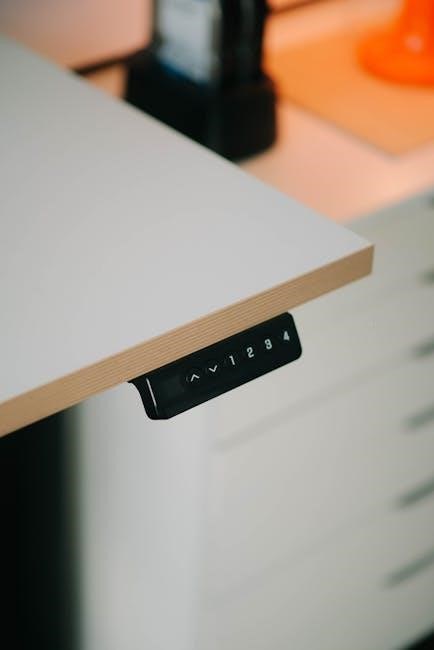
The Tresanti desk’s control panel is your central hub for adjusting and managing desk height. It features clearly labeled buttons for “UP” and “DOWN” movement, allowing precise control. Long-pressing the “DOWN” button will lower the desk to its lowest setting, indicated by the “bot” display.
Memory presets (labeled H1, H2, H3) enable you to save your preferred heights for quick access. To program a preset, adjust the desk to your desired height and press and hold the corresponding ‘H’ button until a beep confirms the setting. The display will show the current height during adjustment.
The display also provides crucial feedback, including error codes and status indicators. A flashing “RES” indicates the need for a height sensor reset – achieved by holding the “UP” button for 8 seconds. Familiarizing yourself with these functions ensures smooth and efficient operation of your Tresanti desk.

Assembly and Initial Setup
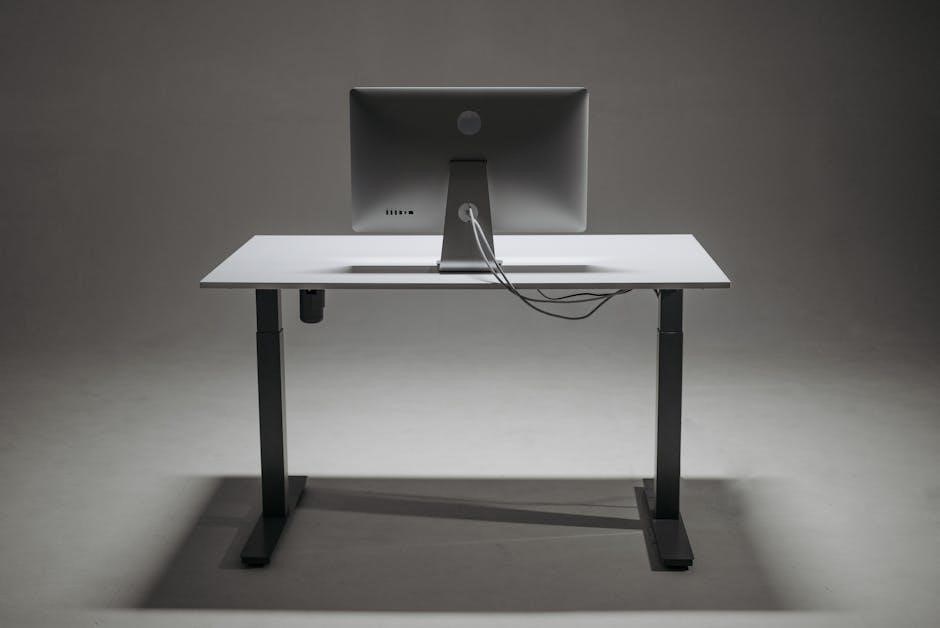
Begin with a thorough unboxing, verifying all components against the checklist. Carefully attach the desk frame, then connect the control box and power supply for initial functionality.
Unboxing and Component Checklist
Upon receiving your Tresanti Adjustable Height Desk, carefully inspect the packaging for any signs of damage during transit. Once opened, lay out all components and compare them against the following checklist to ensure everything is present. This prevents delays during assembly.
- Desk Frame (2 pieces): Left and right leg assemblies.
- Desktop Surface: The main work surface. Note potential for minor scratches.
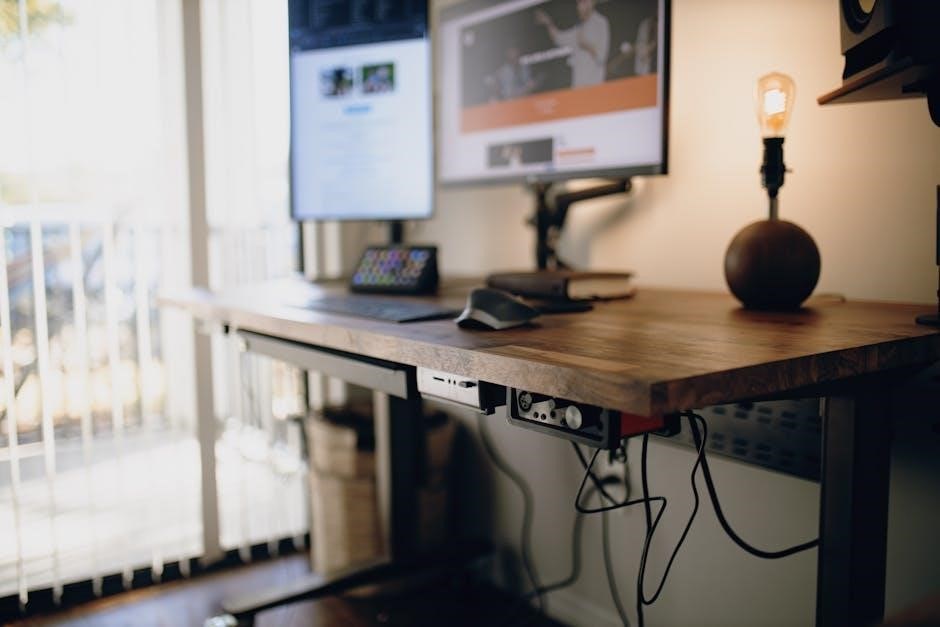
- Control Box: The electronic unit controlling desk height.
- Power Supply: Provides power to the control box;
- Control Panel: Interface for adjusting height and presets.
- Foot Pads: For leveling and floor protection.
- Cables: Connecting the control box, motor, and power supply.
- Hardware Kit: Includes screws, bolts, and Allen wrenches.
- Manual: This comprehensive guide for assembly and troubleshooting.
If any components are missing or damaged, immediately contact Tresanti Customer Care (U.S.-based support) for assistance. Do not proceed with assembly until all parts are accounted for.
Attaching the Desk Frame
Begin by carefully positioning the desktop surface upside down on a protected, spacious surface to prevent scratches. Align the left and right desk frame assemblies with the pre-drilled holes on the underside of the desktop.
Using the provided hardware kit, securely attach the frame to the desktop. Ensure all screws and bolts are tightened firmly, but avoid over-tightening, which could damage the desktop material. It’s recommended to start with hand-tightening all screws before fully tightening them with the Allen wrench.
Double-check the alignment of the frame to the desktop, ensuring it is square and stable. A properly attached frame is crucial for the desk’s stability and smooth operation. Take your time during this step to avoid rework later. Refer to the diagrams in the manual for visual guidance.
Connecting the Control Box and Power Supply
Locate the control box and identify the ports for the motor cables and the power supply. Carefully connect the motor cables from each leg of the desk frame to the corresponding ports on the control box – ensure a secure connection.
Next, connect the power supply to the control box, and then plug the power supply into a grounded electrical outlet. Do not turn on the desk yet. Double-check all connections to ensure they are firmly in place before proceeding.
Pay close attention to the cable management; neatly route and secure the cables to prevent interference with the desk’s movement. Use the provided cable ties or clips to keep the wiring organized and out of the way. A tidy setup contributes to the desk’s functionality and appearance.

Operating Instructions
Effortlessly adjust your desk’s height using the intuitive control panel. Utilize memory presets for personalized comfort, and understand display indicators, including the “bot” signal.
Adjusting Desk Height: Basic Operation
To adjust the height of your TRESANTI Adjustable Height Desk, simply press and hold the UP or DOWN button on the control panel. Release the button when the desk reaches your desired height. The desk will continue to move while the button is held.
Remember that the lowest height setting is indicated when “bot” is displayed on the control panel. Avoid abrupt stops; allow the desk to decelerate naturally. For smooth adjustments, ensure there are no obstructions beneath the desk.
If the desk stops moving before reaching the desired height, check for potential obstructions or refer to the troubleshooting section. Always prioritize safety and avoid placing excessive weight on the desk during height adjustments. Consistent, gentle operation will ensure a long lifespan for your desk’s motor and lifting mechanism.
Using the Memory Presets
The Tresanti desk features convenient memory presets, allowing you to save your preferred desk heights for quick and easy adjustments. To program a preset, first adjust the desk to your desired height using the UP or DOWN buttons.
Then, press and hold one of the numbered memory buttons (typically 1, 2, or 3) until you hear a beep and the display confirms the setting has been saved. To recall a saved height, simply press the corresponding memory button. The desk will automatically move to the programmed position.
These presets are especially useful in shared workspaces or for users who frequently switch between sitting and standing positions. Remember to clear presets if you change your preferred heights significantly. This feature streamlines your workflow and enhances ergonomic comfort.
Understanding the Display Indicators (Including “bot”)
The Tresanti desk’s display provides crucial information about its operation and status. Numerical values indicate the current desk height. Flashing numbers during adjustment signify the desk is moving. Error codes, if displayed, require referencing the troubleshooting section of this manual for resolution.
A key indicator is “bot”. This appears when the desk reaches its lowest height setting, signaling the limit sensor has been triggered. It also appears during the reset procedure, indicating the desk is returning to its initial position. Seeing “bot” after a reset confirms the process is complete and normal operation can resume.
Pay attention to any beeping sounds, as they often accompany display changes and provide auditory feedback. Consistent monitoring of the display helps proactively identify and address potential issues, ensuring smooth and reliable desk operation.

Troubleshooting Common Issues
This section details solutions for frequently encountered problems, such as a desk that won’t move, stops prematurely, or displays error messages. We’ll cover power supply checks and sensor resets.
Desk Not Moving: Power Supply Check
If your Tresanti desk isn’t responding, the first step is to verify the power supply. Ensure the power cord is securely connected to both the control box and a functioning wall outlet. Test the outlet with another device to confirm it’s providing power.
Next, inspect the power adapter itself for any signs of damage, such as frayed wires or a cracked casing. If the adapter appears damaged, do not use it and contact Tresanti customer support for a replacement. Confirm the voltage on the adapter matches your local power requirements.
Also, check the connection between the power supply and the control box. A loose connection can prevent power from reaching the motor. Finally, if the power supply seems fine, proceed to troubleshooting the control panel or motor itself, as the issue may lie elsewhere within the system.
Desk Stops Moving Before Reaching Desired Height
If your Tresanti desk halts before reaching your set height, a tripped limit sensor is a likely cause. These sensors, located within the desk frame, prevent over-extension. One user found unplugging and replugging the 1/8″ jack (headphone-like connector) associated with a sensor allowed the desk to move further.
The desk may have moved past the sensor’s range during a previous adjustment, triggering it. Temporarily disconnecting the sensor allows you to bypass this limitation and complete the height adjustment. Once repositioned, reconnect the sensor.
Alternatively, the desk might require a height sensor reset. This can occur if the desk believes it has reached its maximum or minimum height incorrectly. Refer to the “Resetting the Height Sensor” section for the RESDesk procedure to recalibrate the system and restore full range of motion.
Resetting the Height Sensor (RESDesk Reset Procedure)
If the display indicates a need for a RESDesk reset, or the desk isn’t recognizing its height accurately, follow these steps. Press and hold the UP button (labeled H3) for approximately eight seconds. You will hear a single beep, signaling the reset process has begun.
The display will then start flashing “RES,” indicating the desk is preparing to recalibrate. Crucially, release all buttons immediately after the flashing starts and do not touch any controls during the automatic process. The desk will automatically descend to its lowest position.
During this descent, “bot” will appear on the display. This confirms the reset is complete, and the height sensor has been recalibrated. You can now resume normal operation, adjusting the desk to your desired height with confidence. This procedure ensures accurate height readings and smooth movement.
Advanced Troubleshooting & Sensor Issues
This section details resolving complex problems, including identifying faulty limit sensors (1/8″ jack) and diagnosing motor malfunctions. It also covers interpreting error codes displayed on the control panel.
Identifying and Troubleshooting Limit Sensors (1/8″ Jack)
Limit sensors, resembling headphone jacks, are crucial for preventing the desk from overextending its range of motion. These sensors signal the motor to stop at the highest and lowest points. If your desk stops moving prematurely, a disconnected or faulty limit sensor is a likely cause.
To troubleshoot, carefully inspect each 1/8″ jack connection. Gently unplug only one sensor, attempt to move the desk slightly, and then reconnect it. This process can help pinpoint a malfunctioning sensor. A common fix involves the desk moving past a sensor, triggering it unnecessarily. Unplugging, adjusting, and replugging resets the system.
Ensure connections are secure. If the issue persists after checking connections, consider contacting Tresanti support for potential sensor replacement. Remember to power off the desk before any physical inspection or manipulation of the sensors.
Addressing Issues with the Motor
Motor problems can manifest as the desk failing to move, moving erratically, or making unusual noises. Before assuming a motor failure, verify power connections and control panel settings. A common scenario involves the desk receiving a replacement motor unnecessarily, as simpler fixes often resolve the issue.
If the motor isn’t responding, double-check the power supply and control box connections. Ensure the control box is receiving power. If the motor hums but doesn’t move the desk, a limit sensor might be engaged, preventing operation. Disconnect and reconnect limit sensors as described previously.
Persistent motor issues likely indicate a faulty motor requiring replacement. Tresanti offers motor replacements, but thoroughly troubleshoot other potential causes first. Contact customer support for assistance with motor replacement procedures and warranty claims.
Dealing with Error Codes on the Display
The Tresanti desk’s display utilizes error codes to indicate specific issues with the system. While a comprehensive list isn’t always provided, understanding the “bot” indicator is crucial. “bot” appearing on the display often signifies the need for a height sensor reset (RESDesk procedure). This is a common occurrence after the desk has moved beyond its programmed limits.
If other error codes appear, consult Tresanti’s customer support for interpretation. These codes can relate to motor overload, sensor malfunctions, or communication errors between components. Document the error code and the circumstances surrounding its appearance to aid in troubleshooting.
Attempting a reset (holding the UP/DOWN buttons) can often clear minor errors. If the error persists, avoid continued operation and contact customer care. Ignoring error codes can lead to further damage and void the warranty.
Maintenance and Care
Regular cleaning of the desk surface and inspection of cables are vital for longevity. Promptly address any loose connections or damage to ensure continued smooth operation.
Cleaning the Desk Surface
Maintaining a clean desk surface not only enhances its appearance but also protects the materials from potential damage. For routine cleaning, a soft, slightly damp cloth is generally sufficient. Avoid using abrasive cleaners, solvents, or harsh chemicals, as these can discolor or degrade the desk’s finish.
If spills occur, wipe them up immediately to prevent staining. For stubborn marks or residue, a mild soap solution can be used, but always test it in an inconspicuous area first. Ensure the cloth is only damp, not soaking wet, to avoid water damage to the desk’s components.
Regular dusting will also help prevent the buildup of dirt and grime. Consider using a microfiber cloth for optimal dust removal. Avoid excessive moisture, and always dry the surface thoroughly after cleaning to preserve its quality and appearance.
Inspecting Cables and Connections
Regularly inspect all cables and connections associated with your Tresanti adjustable height desk to ensure optimal functionality and prevent potential issues. Pay close attention to the power cable, control box connections, and the motor cables. Look for any signs of damage, such as fraying, kinks, or loose connections.
Ensure all connections are secure by gently tugging on each cable. If a connection feels loose, disconnect and reconnect it firmly. Specifically, check the 1/8″ jack connections related to the limit sensors – these can sometimes become dislodged. Avoid forcing connections, as this could cause damage.
Periodically unplug the desk from the power source to inspect the cables without risk of electrical shock. A visual inspection can reveal hidden damage. Properly routed cables prevent strain and accidental disconnection, contributing to the desk’s long-term reliability.
Long-Term Maintenance Tips
To maximize the lifespan of your Tresanti adjustable height desk, implement a few simple long-term maintenance practices. Avoid overloading the desk with excessive weight, as this can strain the motor and lifting mechanism. Distribute weight evenly across the surface.
Periodically check and tighten all screws and bolts, particularly those securing the frame and legs. Lubricate moving parts, if accessible, with a silicone-based lubricant to ensure smooth operation. Be mindful of the environment; avoid exposing the desk to extreme temperatures or humidity.
Regularly utilize the desk’s full range of motion to prevent the motor from seizing. Keep the area around the desk clear to avoid accidental damage to cables or the control box. Following these tips will contribute to years of reliable performance and enjoyment of your Tresanti desk.
Customer Support and Warranty Information
Tresanti provides U.S.-based customer care for assembly guidance, maintenance, and issue resolution. Warranty coverage details are available, alongside instructions for returns or requesting replacement parts.
Contacting Tresanti Customer Care (U.S.-Based Support)
For immediate assistance with your Tresanti adjustable height desk, reaching their U.S.-based customer care team is straightforward. Tresanti prioritizes customer satisfaction, offering guidance for assembly, operation, and troubleshooting. While specific contact details (phone number, email address) aren’t explicitly provided in the readily available information, their commitment to prompt assistance before and after purchase is emphasized.
Many users report positive experiences with Tresanti’s support, even receiving replacement parts proactively before fully diagnosing issues – a testament to their dedication. If you encounter problems, especially those related to sensor functionality or display errors (like the “bot” indicator), contacting support is recommended. They can walk you through procedures like the RESDesk reset or advise on potential motor issues. Be prepared to describe your issue in detail for efficient resolution.
Remember to check the original packaging or included documentation for any specific contact information provided with your desk model.
Warranty Coverage Details
While specific warranty terms aren’t detailed in the provided resources, Tresanti does offer warranty coverage on their adjustable height desks. It’s important to note that desks may occasionally arrive with minor cosmetic imperfections, such as scratches, which generally do not void the warranty. The extent of coverage likely includes defects in materials and workmanship under normal use.
To understand the specifics of your warranty – including the duration, what is covered, and any limitations – it’s crucial to retain your proof of purchase and refer to the warranty documentation included with your desk. Tresanti’s proactive approach to customer service, demonstrated by sending replacement motors before issue diagnosis, suggests a willingness to honor warranty claims. However, proper documentation and adherence to the warranty terms are essential for a smooth process.
Contacting customer care (U.S.-based support) is the first step in initiating a warranty claim or requesting replacement parts.
Returning a Desk or Requesting Replacement Parts
To initiate a return or request replacement parts for your Tresanti adjustable height desk, your primary point of contact is Tresanti’s U.S.-based customer care team. The process typically begins with contacting them to describe the issue and obtain a Return Merchandise Authorization (RMA) number, if applicable. It’s advisable to have your order details and proof of purchase readily available.
Tresanti’s willingness to ship replacement parts – as evidenced by proactively sending a motor replacement to one customer – indicates a streamlined process for addressing component failures. However, returning the entire desk may be necessary in certain situations, such as for significant defects or warranty claims. Shipping costs for returns may be the responsibility of the customer, depending on the nature of the issue and the warranty terms.
Clear communication with customer care is key to a successful return or replacement request.